
Winter Camping Australia 2026:
The Sleep System & Layering Guide
Transparency Note: Pack and Pitch is reader-supported. While this guide is purely informational, our site contains affiliate links to gear we love. If you click one and make a purchase, we may earn a small commission at no extra cost to you. This keeps the lights on and the campfire burning.
TL;DR: Winter Camping Cheat Sheet
Winter camping in Australia works in most of the country if you get the sleep system right, a sleeping bag with a comfort rating below 0°C, a sleeping mat with R-value 4 or higher, and a three-layer clothing system (merino base, fleece mid, waterproof shell). The Snowy Mountains, Victorian Alps, and Tasmania need –5°C-rated bags or warmer. Coastal NSW and QLD are usually fine with 0°C bags.
The Cold: Snowys/Alps overnight lows hit –10°C in July. Tasmania year-round can drop to –5°C. Even FNQ tablelands see single digits in winter.
The Real Killer: The cold ground steals heat 50× faster than cold air. Your sleeping bag won’t save you without an R 4+ mat underneath. This is the rule most beginners break.
The Layer System: Merino base (no cotton), fleece or down mid, waterproof shell. Beanie + thermal socks + gloves. Layer for movement, not for sitting still.
The Sleep System: –5°C comfort sleeping bag (not “extreme”) + R 4+ mat + silk or fleece liner + dry sleep clothes. All four matter.
The Rule: Test the whole setup in your backyard at the coldest forecast night before you trust it in the bush. The driveway test costs nothing and saves trips.
Why winter camping in Australia is actually the best
The Aussie camping calendar runs from October to Easter for most people. They’re missing 70% of the year and the best of it.
Winter (June–August) gives you: empty campgrounds where you’d queue for a site in summer, no mosquitoes, no flies, no snakes (they’re hibernating), crisp dry mornings, frost on the tent flap at sunrise, the Milky Way visible from horizon to horizon, and smug satisfaction at being the only family at a Wilsons Prom site that books out 12 months ahead in summer.
The trade-off: you have to get the gear right. Get it wrong and you’ll have a miserable, shivering night that becomes a “we’re never doing that again” memory. This guide is the system that makes winter camping comfortable instead of a survival exercise.
How we know what AU winter actually does
This article draws on three sources of truth, not generic cold-weather advice:
- Bureau of Meteorology overnight low data for camping regions across AU and NZ — actual minimum temperatures, not vibes.
- Our directory of 145+ AU and NZ campsites, filtered by elevation. Of those, 38% sit above 600m where overnight lows below freezing are plausible May through September.
- 200+ ProductReview.com.au reviews citing specific winter conditions at specific locations — Snowy Mountains, Cradle Mountain, Mt Buller, Walls of Jerusalem.
We’ve published Pack & Pitch since 2024 and review camping gear specifically for Australian conditions. This isn’t translated US/UK advice — Aussie winter has its own rules.
How cold does AU winter actually get?
The mistake most generic guides make is treating “winter” as one thing. It isn’t. Here’s what overnight lows actually look like June–August:
| Region | Typical overnight low | Bag rating you need | Mat R-value |
|---|---|---|---|
| Snowy Mountains (NSW), Victorian Alps | –5°C to –12°C | –10°C comfort | R 5+ |
| Tasmania (high country) | –5°C to –10°C | –5°C comfort | R 4–5 |
| Tasmania (lowland), NZ South Island | 0°C to –5°C | –5°C comfort | R 4 |
| NSW Tablelands, Vic high country (non-alpine) | 0°C to 5°C | 0°C comfort | R 3–4 |
| NSW South Coast, Vic coast, SA | 5°C to 10°C | 5°C comfort | R 3 |
| QLD coastal, NSW Mid-North Coast | 10°C to 15°C | 10°C comfort | R 2 |
| FNQ tablelands (Atherton) | 5°C to 10°C — yes, really | 5°C comfort | R 2–3 |
| NT (Top End) | 15°C to 20°C | 15°C comfort or liner | R 1–2 |
The sentence that catches people out: “yes, FNQ gets cold in winter”. The Atherton Tablelands routinely drop into single digits overnight. Cairns is mild, but climb 700m and you’re in genuinely cold territory.
The 5 things most people get wrong
1. They focus on the sleeping bag and ignore the mat
This is the cardinal sin of winter camping. The cold ground steals body heat roughly 50 times faster than cold air. A $600 down sleeping bag on a $30 air mat from Kmart will leave you shivering, because your body weight crushes the bag’s insulation underneath you and the air mat conducts cold straight through.
The fix: a sleeping mat with the right R-value (resistance) for the conditions. R 1–2 is summer-only. R 3 handles three-season camping. R 4+ is the threshold for genuine winter camping. R 5+ is what you want for the Alps in July.
R-values are additive. If you’ve got a summer mat (R 2) and want to camp in winter, layer a closed-cell foam mat (R 2) underneath. R 2 + R 2 = R 4. Free upgrade. For our full sleeping bag and mat system breakdown: Read the sleeping bag guide →
2. They wear cotton
Cotton kills. That’s the literal phrase used by every alpine instructor in the country, and it’s not hyperbole. When cotton gets wet, from sweat, dew, condensation, or rain, it loses 100% of its insulating value and steals body heat as it dries. In cold conditions this turns a discomfort into a hypothermia risk.
The fix: merino wool or synthetic base layers. Merino wins on smell control and warmth-when-wet. Synthetic wins on dry time and price. Both are vastly superior to cotton in cold conditions.
This applies to socks especially. Cotton sports socks in winter boots = wet, cold feet by lunchtime. Merino hiking socks = warm and dry all day.
3. They underestimate condensation
Cold humid air + warm tent body = condensation on every internal surface by morning. It drips on the sleeping bag, soaks the inner ceiling, and makes you think the rain came in (it didn’t that’s your own breath).
The fix: ventilate even when it’s cold. Always crack a vent or door zip. A small gap that lets moist air escape is worth ten degrees of perceived warmth at 7am. Coastal sites and Tasmania get the worst, condensation vent aggressively.
4. They eat cold dinners
Your body burns calories to stay warm. In winter, you need a hot, fatty dinner before bed, not a cold sandwich. Hot food + a hot drink at sunset is a deliberate strategy: it raises your core temp going into the cold hours, and a full stomach gives the metabolism something to burn during the night.
The fix: plan one-pot hot meals. Curries, stews, pasta, dehydrated meals from On Track Meals or Back Country Cuisine. Pair with a hot drink, tea, hot chocolate, or just hot water with a stock cube. Whisky doesn’t count (alcohol dilates blood vessels and makes you colder).
Best camping stoves for one-pot winter cooking →
5. They sleep in their hiking clothes
Sleeping in damp hiking clothes is a guaranteed cold night. Sweat from the day stays in the fabric, the moisture conducts heat away from your body, and your sleeping bag spends the night fighting wet clothes instead of warming you.
The fix: dedicated dry sleep clothes. Merino base layers, dry socks, beanie. Nothing you wore that day. They live in a separate dry bag in your pack, and they only come out at bedtime. Game-changer.
The winter sleep system, properly explained
This is the bit that matters more than any other piece of advice in this article. A working winter sleep system has four components, and skipping any one of them undermines the others.
Component 1: The sleeping bag
Look for “comfort rating” (the EN 13537 / ISO 23537 standard), not “extreme rating” (which is the survival temperature where you won’t die, different thing entirely).
- Coastal/lowland AU winter: 0°C comfort is enough.
- NZ South Island, Tasmanian high country: –5°C comfort.
- Snowys/Alps: –10°C comfort, no compromise.
Down vs synthetic: down packs smaller and is warmer per gram, but fails when wet. Synthetic is bulkier and heavier but keeps insulating when damp. For AU coastal winter, synthetic is often the smarter choice. For dry alpine, down wins.
Full sleeping bag guide with picks →
Component 2: The sleeping mat (R-value)
As covered above, this is the bit beginners skip and pay for. R 4+ for serious cold. R 3 for shoulder season. Self-inflating mats with foam cores beat air-only mats in cold conditions because foam resists conductive heat loss better than air alone.
Component 3: The liner
A silk or fleece liner adds 3–5°C of warmth to any bag. They’re cheap (under $100), easy to wash, and double as a summer-only sleeping bag. Pack & Pitch recommends adding one to any winter setup.
Component 4: Dry sleep clothes
Merino base layer top, merino long johns, dry socks, beanie. Sealed in a dry bag during the day. The full set weighs almost nothing and changes the entire experience of a cold night.
Layering: the three-layer system
For day use, moving around camp, walking to the loo at midnight, sitting by the fire, the three-layer system is the global standard for cold weather, and it works in Australia.
Base layer (against skin)
Merino wool (best, expensive) or synthetic moisture-wicking thermals (good, affordable). Job: pull sweat away from skin. Never cotton.
Pack & Pitch recommends Macpac, Icebreaker, Mountain Designs for merino. Kathmandu and BCF house brands for synthetic.
Mid layer (insulation)
Fleece or down jacket. Job: trap warm air. A 100-weight fleece for moderate cold; a down puffer for serious cold. Synthetic puffers (PrimaLoft) work better in damp conditions; down works better in dry cold.
Outer layer (shell)
Waterproof, windproof, breathable. Job: stop wind and rain getting through to the insulation. A proper shell jacket, Gore-Tex or equivalent, is worth the investment if you’ll camp more than a few times a year. A cheap rain poncho works for casual use.
The extras that matter more than you think
- Beanie: you lose 15–20% of body heat through your head. Always have one within reach in the tent.
- Gloves or mittens: liner gloves under waterproof outer mitts. Cold fingers ruin everything else.
- Thermal socks: merino, not cotton. One pair to walk in, one dry pair for sleeping.
- Buff or neck warmer: seals the gap between collar and beanie.
The tent: 3-season vs 4-season reality
Most Australian campers use a 3-season tent year-round and that’s usually fine. A genuine 4-season tent is overkill for everywhere except the Snowys, the Alps, and Tasmania’s high country. The differences:
- 3-season: standard family tent, Coleman Instant Up Gold, OZtrail Fast Frame, Wanderer Magnitude. Adequate for AU lowland winter. Cracks in genuine alpine snow loads.
- 4-season: snow-rated, fewer mesh panels, stronger pole structure, full snow skirts. Macpac Olympus, Zempire Pyrazon, MSR Access. Necessary above the snowline.
For 95% of AU winter camping, a quality 3-season family tent is fine. For the Main Range, Mt Hotham, Cradle Mountain in genuine snow conditions, get a real 4-season tent or use a hut.
Cooking and hot drinks
Stoves get cranky in the cold. Butane canisters lose pressure below 5°C and stop working entirely at 0°C, which is right when you need them most. The fix: switch to propane/butane mix canisters (red label) for winter, or use a liquid-fuel stove (Trangia methylated spirits, MSR WhisperLite white gas).
Recommendations:
- Family camping winter: Weber Baby Q (gas bottle) or Coleman Triton (twin burner with windscreen). Both run propane bottles, which work fine in cold.
- Solo or hike-in winter: Trangia (methylated spirits, works in any temperature) or MSR WhisperLite International.
- Avoid in winter: small canister stoves like cheap Jetboil clones using basic butane. They’ll fail you exactly when you need them.
Hot drinks matter as much as hot food. Pack a thermos, fill it at dinner with boiling water, and you’ve got hot tea or coffee on tap from sunset to sunrise without re-firing the stove.
Best camping coffee makers (winter-tested options) →
Power for cold nights
Cold weather hammers batteries. Lithium and lead-acid both lose 30–50% capacity below 5°C. Two implications:
- Your phone battery will die fast, keep it inside your sleeping bag at night.
- Power station capacity drops in the cold. If you’re running a CPAP or fridge, factor 30% extra capacity into your planning.
For winter trips, a LiFePO4 (lithium iron phosphate) power station handles cold better than older lithium-ion units. The Bluetti AC180 and EcoFlow Delta 2 are both decent winter performers. Full power station comparison →
Four AU winter destinations and the gear tweaks for each
Kosciuszko National Park, NSW
The peak of AU winter camping difficulty. Overnight lows of –10°C are common in July at Charlotte Pass and Thredbo Diggings. Snow is regular above 1,400m.
Gear tweaks: –10°C comfort bag, R 5+ mat, 4-season tent or hut booking, full snow gaiters, properly waterproof boots. Don’t camp here in winter as a beginner, work up to it via three-season camping at lower elevations first.
Cradle Mountain–Lake St Clair National Park, Tasmania
Year-round cold, snow possible May–October. The Overland Track in winter is genuinely extreme; the standard car-camping sites at Cradle are manageable for prepared campers.
Gear tweaks: –5°C bag, R 4+ mat, waterproof everything (Tassie weather changes hourly), down puffer + Gore-Tex shell. Book the huts on the Overland Track if you’re going beyond car camping.
Wilsons Promontory National Park, Victoria
Coastal Victorian winter, mild on paper (5°C overnight lows), brutal in practice because the wind never stops. Tidal River campground is sheltered; Refuge Cove and Sealers Cove are exposed.
Gear tweaks: 0°C bag is enough; the wind is the killer here. Pitch a 3-season tent with all guy lines tensioned, choose a sheltered site, bring a windbreak for the kitchen area. Read our 7-Zone Campsite Setup Guide for wind-aware pitching.
Wilpena Pound, SA Flinders Ranges
Outback winter, hot days (20°C+), cold nights (down to 0°C). The temperature swing is the trap. Best AU winter camping for first-timers: sunny days, cold-but-not-freezing nights, no rain, no wind.
Gear tweaks: 0°C bag, R 3 mat, sun protection during the day, layers for the rapid afternoon temperature drop. Wilpena Pound Resort offers powered and unpowered sites year-round.
The driveway test
Before any winter trip, do this: assemble your full sleep system in the backyard or driveway on a forecast cold night. Sleeping bag, mat, liner, sleep clothes, beanie, the lot. Sleep through the night.
If you’re cold at home where the car is 30 metres away and the warm bed is 15 metres away, your system isn’t ready for the bush. Adjust before you commit to a trip you can’t bail on at 2am.
This is the single best piece of advice for new winter campers and it costs nothing. More on the driveway test in our first-time camping guide →
Frequently asked questions
The winter camping kit list
Use this as a tick-the-box pre-trip checklist. The full Pack & Pitch checklist (with summer items too) is here: Ultimate Camping Checklist →
Sleep system: sleeping bag (right rating), mat (right R-value), liner, dry sleep clothes, beanie
Clothing system: merino base layers, fleece/down mid layer, waterproof shell, beanie, gloves, merino socks (×2 dry pairs), buff/neck warmer
Shelter: tent (3 or 4-season as appropriate), groundsheet, full peg set with steel pegs, guy lines
Cooking: winter-grade stove, propane/butane mix canisters or liquid fuel, lighter + matches, thermos, hot meal ingredients, hot drink supplies
Power: headlamp + spare batteries, power station (factor 30% extra for cold), phone charging cable
Safety: first aid kit, PLB if remote, paper map + compass (don’t rely on phone GPS in cold), emergency space blanket
Comfort: chair with insulated padding, hot water bottle, thick socks for around camp, dry bag for sleep clothes
Winter camping in Australia is genuinely the best time of year if you get the gear right. Empty campgrounds, no insects, no snakes, dry mornings, the Milky Way overhead. The cost of entry is a properly assembled sleep system (bag + mat + liner + dry clothes) and a layered clothing system. Get those right and the rest is just camping.
If you’re new to it, start at Wilpena Pound or the NSW South Coast in June rather than the Snowys in July. Build up. Do the driveway test. Trust the system before you trust the bush.
Got a winter camping setup that’s served you well in genuinely cold AU conditions? Drop it in the comments, we update this guide each May based on what’s actually working in the field.
Latest Posts
- Camping With an EV or Hybrid in Australia 2026: Can You Run a 12V Fridge?
 EVs and hybrids have no alternator, so a dual-battery setup is out. Here is how V2L actually works for camping, which AU models have it, and what a fridge costs you in range.
 - Best Camping Headlamps: From Serious Gear to Panda Faces (2026)A dead headlamp at 11pm ruins the whole trip. We’ve filtered Amazon AU down to 6 headlamps that actually hold up in Australian conditions — including the one that already converted a real sale.
- Winter Camping Australia 2026: The Sleep System & Layering Guide
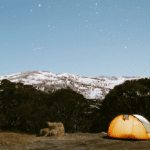 AU winter camping done properly. The sleep system that keeps you warm at -5C, the layers that beat cotton-kills hypothermia, the AU regions and what gear they actually need. Driveway-tested, ProductReview-cross-checked.
 - First Time Camping in Australia? Don’t Make These Mistakes (2026 Guide)
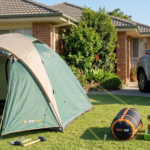 Most first camping trips fail on systems, not gear. Generator rules, grey water, the driveway test, and what to actually pack. The honest beginner’s guide for Australian conditions.
 - How to Power a CPAP Machine While Camping in Australia (2026 Guide)
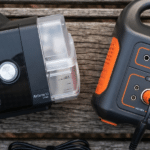 Running a CPAP off-grid doesn’t need an expensive inverter setup. The right 12V cable, the right settings, and a 500Wh station will cover most people for 3–5 nights. Here’s exactly what to buy and how to set it up.